Pages

Sunday, September 29, 2013

Layout Galore

If you follow me on Instagram, you will notice that I have not posted a lot of the layouts on this blog yet. I got to buck up on the blogging front and be more active here. Sorry for the neglect and the lack of updates. Do make it a point to visit here and leave some comments. I promise to be more active. (:

How about a massive update on all the layouts I have done for the past few months?


Phew! There you go! I must say it has been fun playing with all the new CHA 2013 release. The new Hello Again Carta Bella collection and the AC Polka Party collection are my current favourites! You cant go wrong with them and I am so glad I will be able to keep them for future usage. Not forgetting my favourite Crate Paper lines, I am in scrap heaven! 

What projects are you working on right now? Any favourite products and papers of yours? I would love to hear about it. Have a great Sunday.

Tuesday, September 24, 2013

Made with Love

A few posts ago, I said I was going to announce a piece of good news. I am finally ready to share..


I am officially designing for Made with Love, a local scrapbook store in Singapore. It is such an honour to do so and to be a part of this wonderful team.

For those local scrappers who do not know, MWL was the store that started my scrapbooking hobby. 5 years ago, I stumbled into this store and there was not turning back ever since. There is just something special about the way they run this store - the activities, the crazy events we had, the mad rush on Thursdays for new arrivals and the good times I had interacting with scrappers and staff were ALL great memories. I used to be one who idolise their DT's display work and wonder if I will ever be as good as them...

So when they closed down temporarily last year, my heart ached a lot. It was like a part of this hobby would never be the same again. But by the grace of God, they are BACK and i am so happy to be able to contribute to this store.

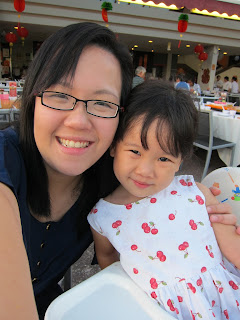
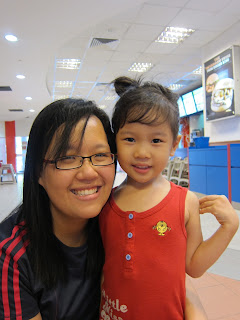
They had their grand opening last Saturday and I was so glad to be able to find time to celebrate alongside them. The family joined in and B and K had so much fun at the store. I must say they enjoyed every bit of it. Some photos from that day...


I got to say.. for those who did not make it on Saturday missed out on some great deals. Haha I practically queued up 4 times to pay at the cashier simply because of their bi-hourly deals they had. It was so not good for the pocket but I was so glad to be able to get some good purchases. Not to worry, I am sure good promotions will come soon again. But... Arent we glad this store is back? Cant wait for the year ahead knowing that my favourite scrapbook store is back in town! 

Made with love - you will always have a special place in my heart!

Monday, September 23, 2013

Techniques and Tricks #5 - Die Cut backgrounds

Hey everyone! Its my turn on the CP blog. Here is the full link. For the longest time, I hesitated in buying a die-cutting machine, even after seeing the immense variety of background patterns that could be created. It's expensive and I wanted time to think deeper as to whether or not one was necessary. This resulted in me telling myself that I could replicate the "look" on my own. So today, I will share some tips as to how to create your own die-cut backgrounds with just your everyday supplies and tools.


1.Masking & Misting Technique

1-1 
2

If we look through our scrapbook supplies, I'm sure that everyone owns a variety of mask templates. More intricate and rounded mask designs are harder to cut with your craft knife, so to save time and effort, I recommend locating mask designs that have straighter lines and larger surface areas.
When getting started, a good trick that I found is to first spray a layer of fine mist over the intended area for creating your die-cut background. This is the area in which you'll be cutting your design from. Now, select shapes to remove with your craft knife. Leave some of the misted areas untouched so that they shine through, creating a customized background pattern - something a machine can't do!

3

5

Using the same masking and misting technique, here is another layout created using the older Maggie Holmes collection. It's the same mask, but look how different the background looks on this page compared the earlier one.

6
~
2. Creative Templates On-Hand
7
8

For this next do-it-yourself die-cut session, you'll want to find a few punch outs, a 3 x 4 heart journaling card (Close Knit), some wooden veneers and a large chipboard heart. All are potential templates that may be used to create your own die-cut background.

9

Placing the chipboard heart on your sheet of paper, trace around it with a pencil and use a craft knife to remove it. Thereafter, position patterned paper behind the cut-out  and adorn it with embellishments.

10

Using the same steps as above, cut out the heart shape from this 3 x 4 journaling card. There are dotted lines, which makes it all that' much easier to go around with a craft knife.

12
13

Finally, to tie together all the elements on this layout, I created straight lines between each section. A simple needle and thread could enhance these lines and that's exactly what I did. Simply draw straight lines with a pencil, poke holes and sew away!

14

I hope this inspires you to get started on your own background die-cut patterns. There are endless possibilities. Explore them, come up with what works best for you and I'm sure the end result will be equally as good, even without a die-cutting machine. After all, a machine can only help quicken your scrapbooking process, but it's truly YOU that makes a page worthwhile as it embraces your creativity and effort. 

Leave some love on the CP blog today too..
Happy Monday! 

Thursday, September 19, 2013

For the girl who turns 5 ...


Where did the time go? The last I checked you were 3 and right now, you will be turning 5. You have grown into a beautiful girl of your age. Fiercely independant, incredibly smart and intelligent. You are kind, sweet and so thoughtful. You are K and you are You. There wouldn't be any words to describe the joy you bring to our lives. Just remember that we do love you so.


Happy birthday, K.


Saturday, September 14, 2013

Simple layouts : Scrapbook Process

Sometimes simple is good. Occassionally, I allow myself to indulge in my leftovers and try to create something beautiful. Today, I would walk you through on my process...


Grab your leftover papers and embellishments. I have a basket filled with scraps that I love to rummage through.

Step 1 : Select a base colour for your background.
Step 2 : Cut strips of papers. They are a great way of covering space on a page.


Step 3: Play around with positioning and layer papers on top of each other. I love using this sheet of Crate Paper Tags and Accent die cuts that gives me lots of options to cut and layer.


Step 4: Once the layers are done, look through the embellishments you've at hand and find what fits. Mix the colours up and compliment embellishments with the overall colour theme.


Step 5 : Dont fuss on the nitty gritty. Call it done and enjoy.


_

I thoroughly enjoyed my 30 mins scrapbook layouts adventure. Do share with me on your scrapbook process too. I would love to hear about it.


Friday, September 13, 2013

Good morning, Saturday

Two more days before the start of Term 4. How time flies when you're having a good break and lots of fun. I have never scrapped so much in my life and this week proves that I can do so. Haha. I have not been sleeping much since I have been busy trying to clear assignments after assignments and playing with all the new products.

Cant wait to reveal all of them slowly on this blog. For now, some sneaks of what is to come in the next few months... Enjoy!


Excited about the new lines from Crate Paper? You should be... These collections are truly what signifies Crate best! True to its style and never fails to impress.. Grab them once they reach your stores.

Have a great Saturday ahead.

Thursday, September 12, 2013

steals my heart ...

Pinterest has seriously turned my world upside down. I am loving all the lovely inspiration that I am getting.. Just click on the search bar and out comes endless possibilites. I am sharing with you this picture I found while searching for Christmas ideas this year. Certainly, my most favoutite season of the year is here so I am preparing early..


LINK 

Amazing, isnt it? I was so inspired to get started. So from this, I decided to experiment with this concept. It was a birthday gift for a friend. I bought these wired meshed frames from a local store and decided on the colour scheme of kraft and pink. 


I die-cut tags using my Cameo and overlapped different tags together, using brads. Bend these tags a bit to create more texture. Then it was all about adding minute details like wood veneers, cork elements and gold stars. I am completely loving what I see and i want to do more!


I did a little card to go along with it. Signed, sealed, delivered. I hope she loves it. When the time lends itself again, I am going to try it at a bigger scale as promised in the photo above. Off to get some embriodery hooks tomorrow, perhaps?

Have a great Thursday.
Related Posts Plugin for WordPress, Blogger...